Leveraging SSH for network security

System administrators, developers, IT support people, and power users all find Secure Shell (SSH) a very useful protocol for connecting to systems remotely over a secure network. Because of its cryptographic nature, SSH is always preferred to other insecure protocols like Telnet and FTP. It is also the protocol of choice for accessing Linux servers on many popular cloud services, such as Amazon Web Services and Microsoft Azure.
SSH is based on a client-server architecture where the client is the system the user is working on and the remote system being managed is the server. While most Linux and Mac OS X machines have the SSH application built-in and accessible through the terminal, Windows OS makes use of third-party SSH clients and servers to set up an SSH connection for purposes of software update, configuration management and deployment on Linux and Mac OS X machines, and secure transfer of files. It is nevertheless important to note that the Windows environment natively uses Remote Desktop, WinRm, or PowerShell for remote network management.
PuTTY, for example, is a popular open-source SSH client, available for all major computer operating systems and tablet operating systems, to connect to various SSH servers. Similarly, OpenSSH is another powerful open-source version of the Secure Shell (SSH) tools used by system administrators for cross-platform management of remote systems.
With SSH, access is controlled either through the use of username and password set up by an administrator on the remote server, or a cryptographic key pair generated by the user and shared with the server. Key-based access is the more secure option, and as such it is increasingly common. Usually, SSH runs on TCP port 22, but that can be changed to a different TCP port in the server configuration.
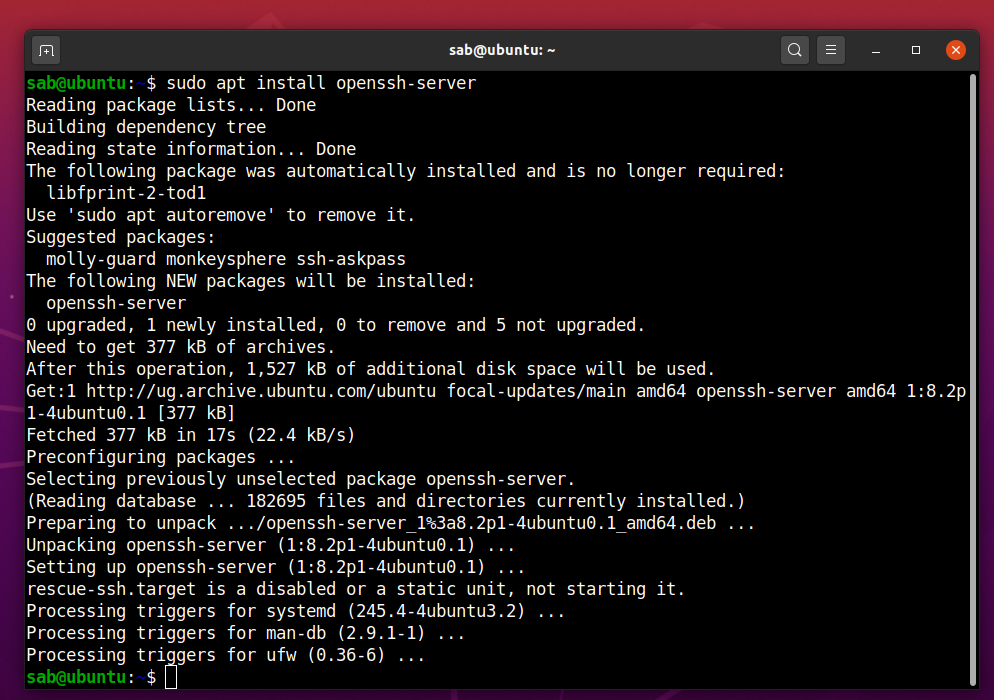
Installing OpenSSH server on Ubuntu desktop
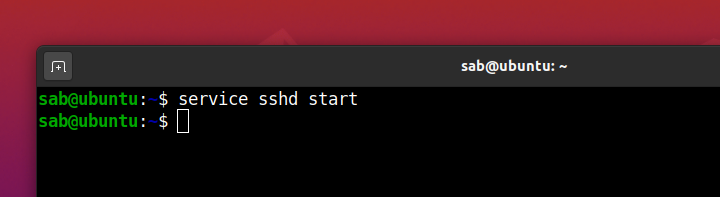
In this lab, we shall connect remotely to Ubuntu Desktop after installing an OpenSSH server, with a cryptographic key rather than a username and password, from a Windows 10 PC using PuTTY client. We first install the OpenSSH server package and then start the SSH service.
Connecting to the OpenSSH server from Windows with a key pair
Key-based access requires a cryptographic key pair made up of a public key and a private key. The server will have the public key and you’ll have the private key. Anyone with a copy of the public key can encrypt data which can then only be read by the person who holds the corresponding private key. Once an SSH server receives a public key from a user and considers the key trustworthy, the server marks the key as authorized in its authorized_keys file.
The private key remains with the user. The possession of this key is proof of the user’s identity and only a user in possession of a private key that corresponds to the public key at the server will be able to authenticate successfully. The private keys need to be stored and handled carefully, and no copies of the private key should be distributed.
To generate a key pair on Windows, we need to get a third-party application ‘PuTTYgen’ from the PuTTY download page. Then under Actions, we’ll click ‘Generate’. The program may ask for some randomness by moving the mouse so as to help it out with the key generation.
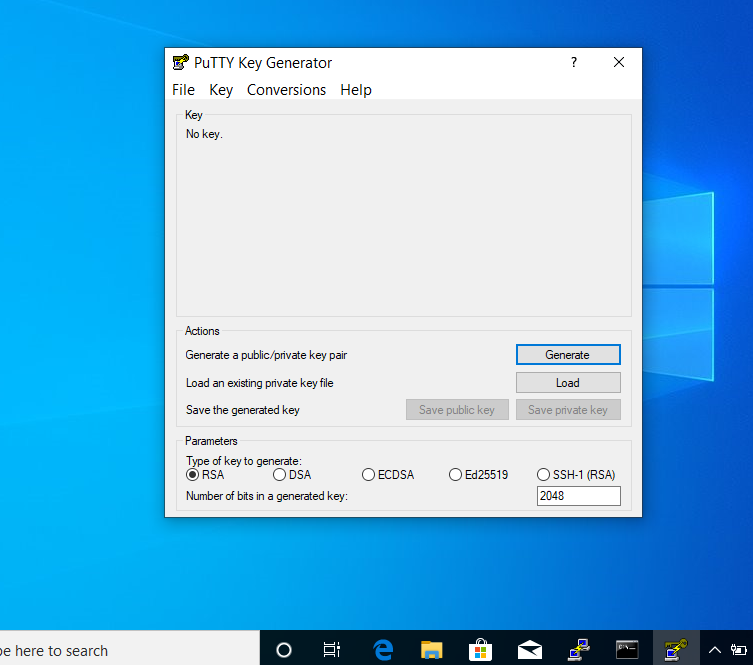

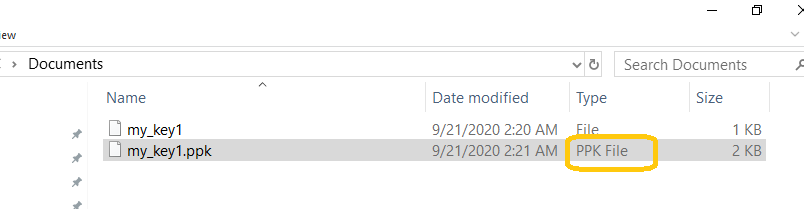
Although a passphrase is not required, you should really specify one as a security measure to protect the private key from unauthorized use. Keys are great, but if your private key gets stolen, anyone with that file will be able to log into your server as you. Setting a passphrase to unlock the key makes it harder for an attacker to log directly into the remote server. A user must enter the passphrase every time the private key is used. We save the private key as ‘my_key1.ppk‘ having the private key file extension of .ppk (PuTTY private key).
The public key within the PuTTY Key Generator can likewise be saved or entirely highlighted and pasted it into the authorized_keys file of the remote SSH server.
![]()
Having transferred the public key, now it’s time to test SSH key authentication. The PuTTYgen tool can be closed and PuTTY client launched to start the connection.
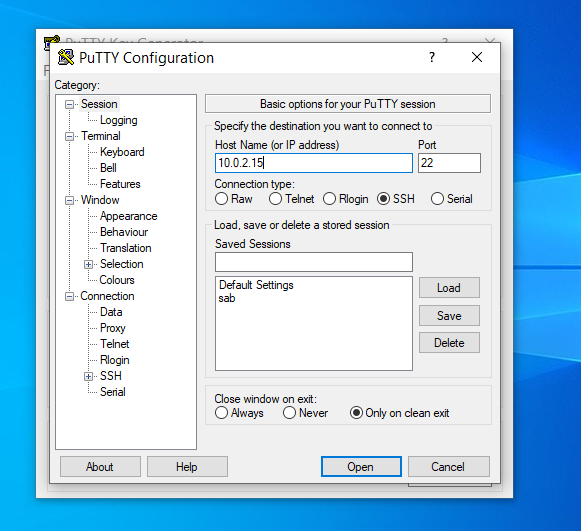
- Enter the remote server Host Name or IP address under Session.
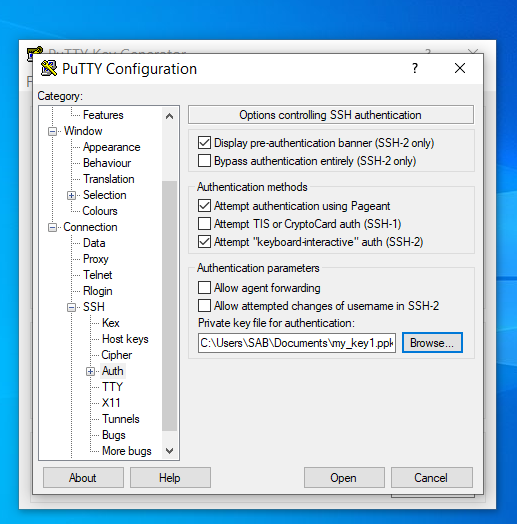
- Navigate to Connection > SSH > Auth.
- Click Browse… under Authentication parameters / Private key file for authentication.
- Locate the my_key1.ppk private key and click Open.
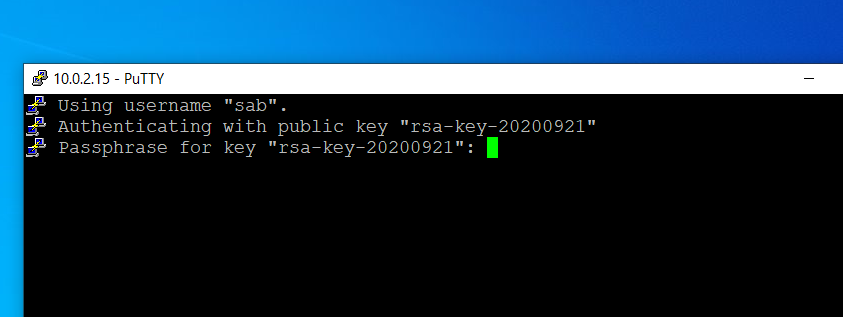
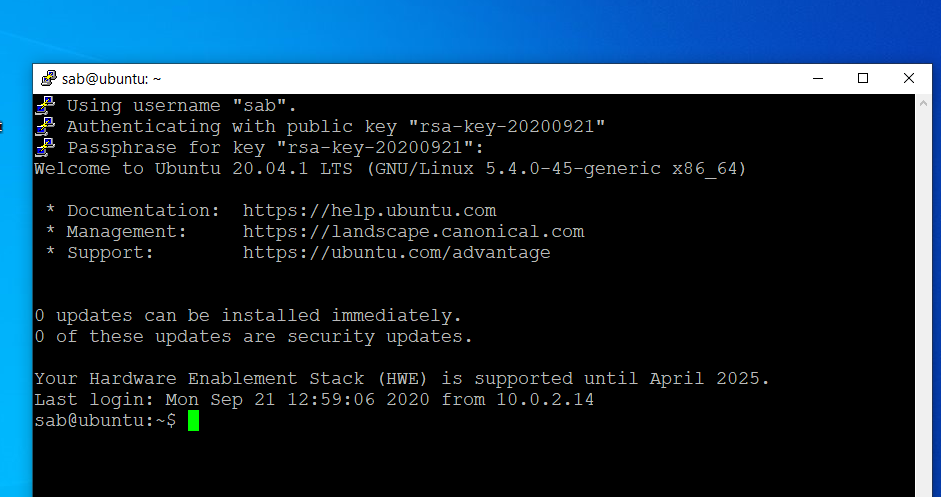
- Finally, click Open again and provide the passphrase for the private key to log into the remote server.
Will you be safe online?


Responses